So, you’ve got your project in Jira running and you already know a thing or two about navigating through the system (If not, you can check out our other tutorials). Now that you’re familiar with the basics, it’s high time that you explore the world of additional functionalities provided by vendors on Atlassian Marketplace. As your project develops and your tasks get more complex, you might need additional assistance with managing them. One of the available methods is using checklists. They allow you to list multiple sub-tasks within one bigger task, and check them separately whenever one of them is finished. Read on to learn how to create checklists in Jira.
Get the right plugin
First thing you need to do is head to Atlassian Marketplace and get the Multiple Checklists for Jira plugin: link. Remember that you don’t have to buy it straight away. Atlassian offers a trial period to help you decide whether a certain product meets your expectations. Moreover, if your organization is non-profit or open-source, you can receive free access to all Atlassian products, Marketplace plugins including. Check out our tutorials for guidance: Community License and Marketplace Apps for Free.
Create complex tasks
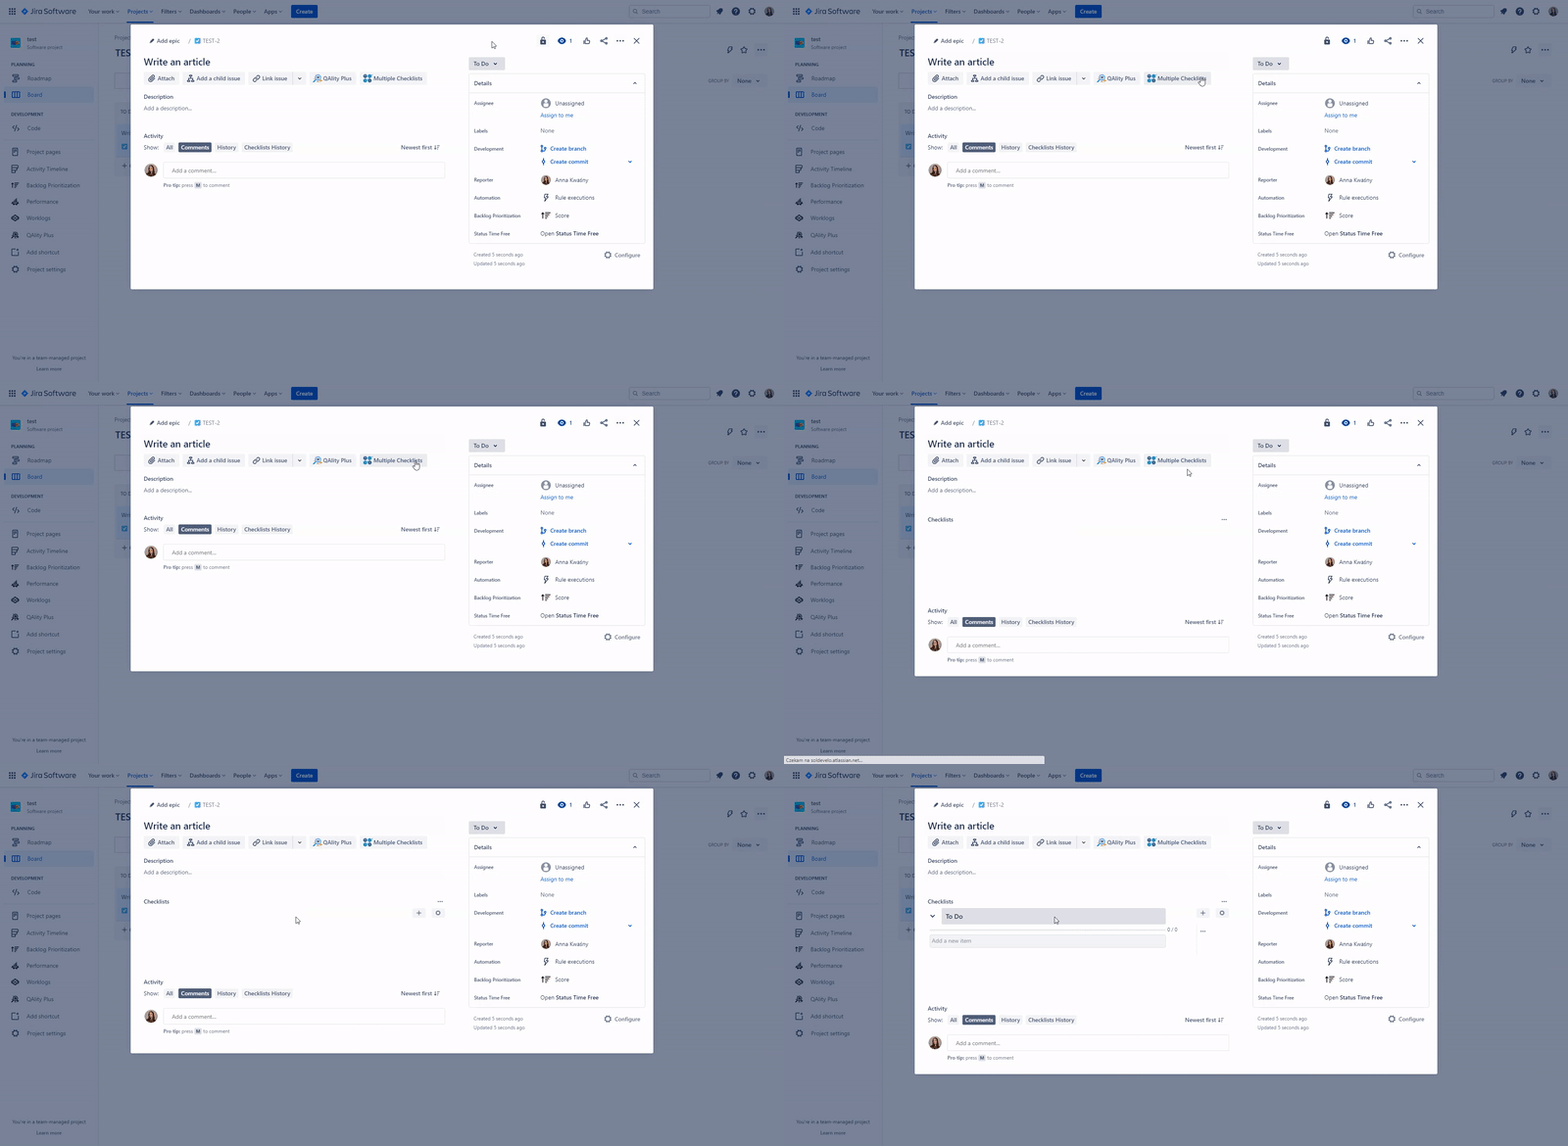
Having the Multiple Checklists installed, you can now start creating your own checklisted tasks. You will notice that a new button has been added to your Jira:

While creating a new task, you can now choose to use Multiple Checklists. Once you choose this option, Jira will allow you to list separate parts of your task. If you finish any of them, you can check the box. While dealing with complex tasks it will help you to stay organized and to track your progress.

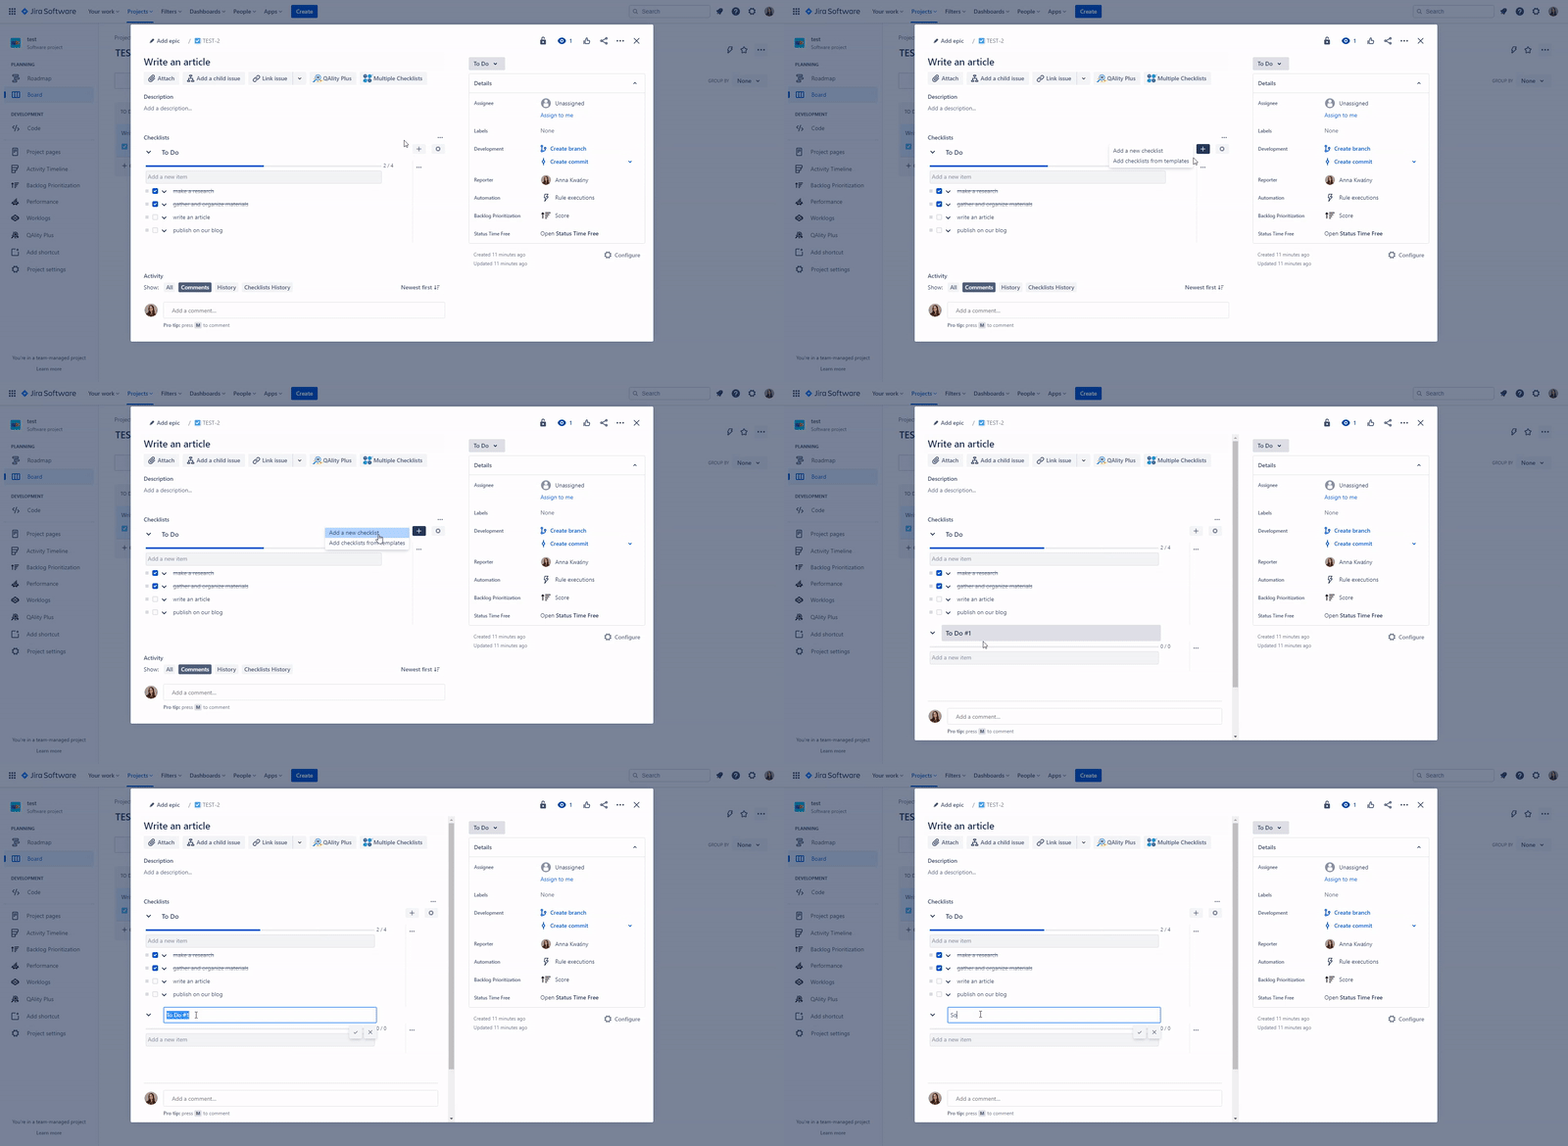
If just one checklist is not enough to cover all of the aspects of your task, you can create multiple checklists in one task:

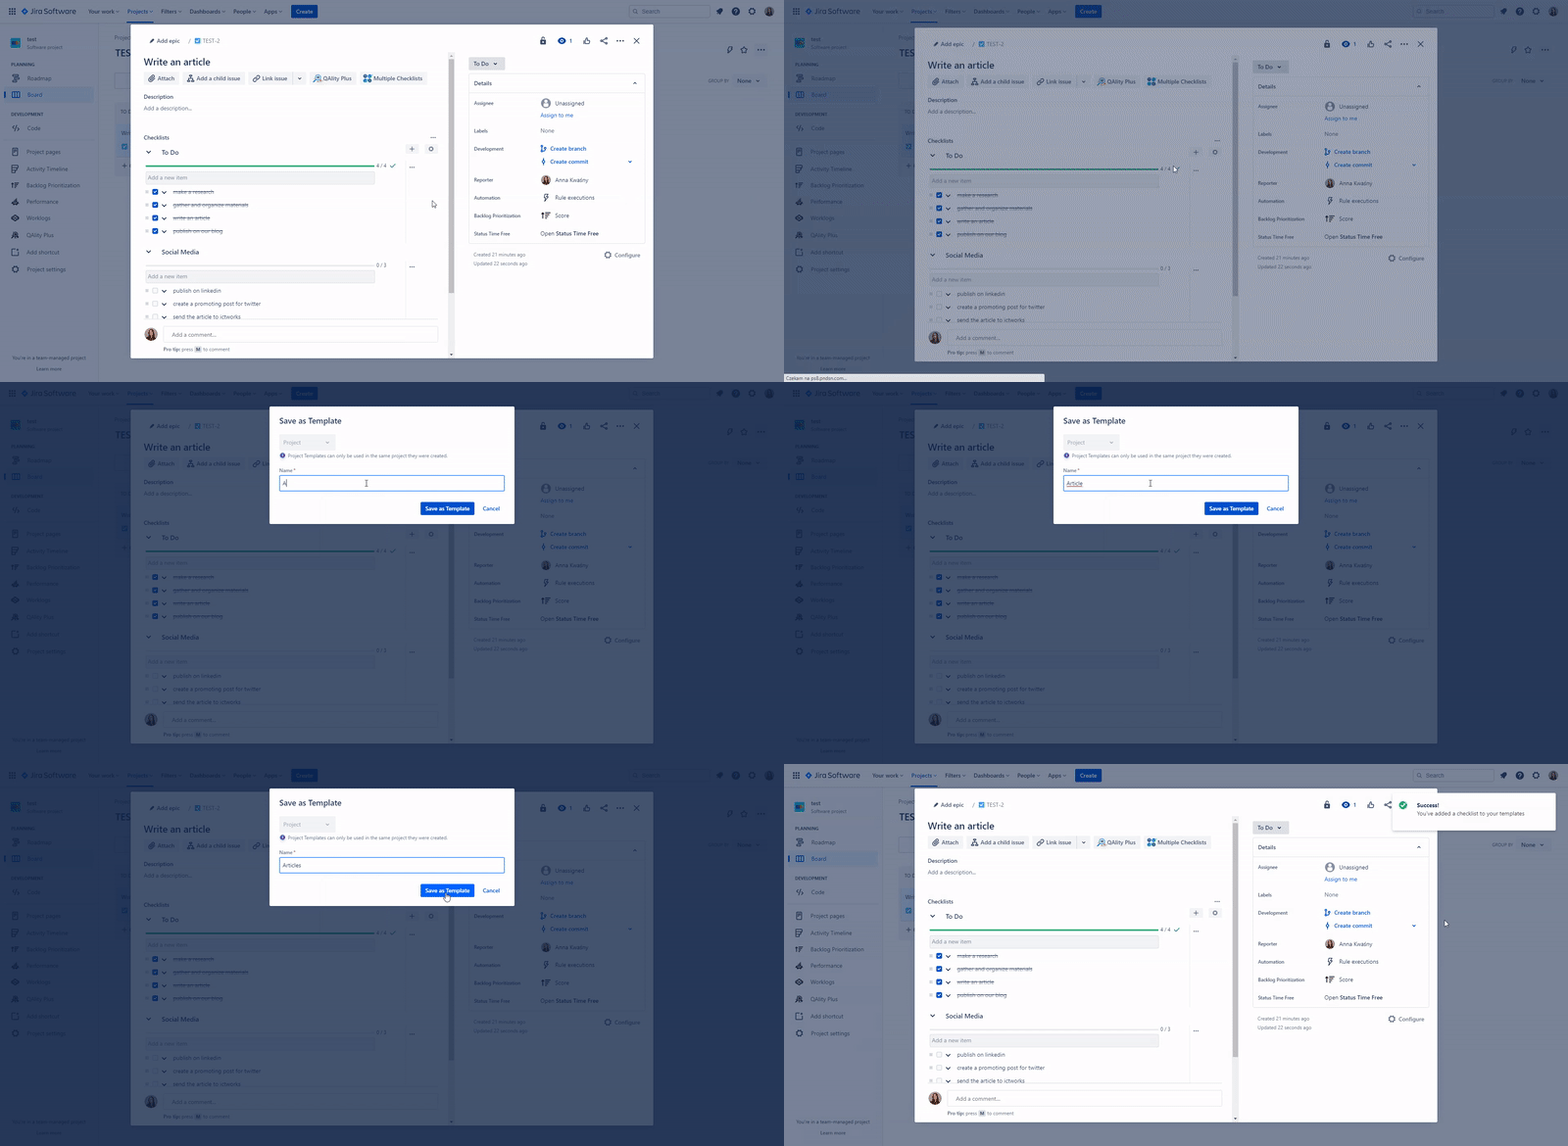
Another useful feature is creating templates for your checklists. Sometimes your tasks’ structure is repetitive and it would be a waste of time to write down their separate points every single time. To eliminate this problem, you can save your checklists as templates and use them wherever you need:

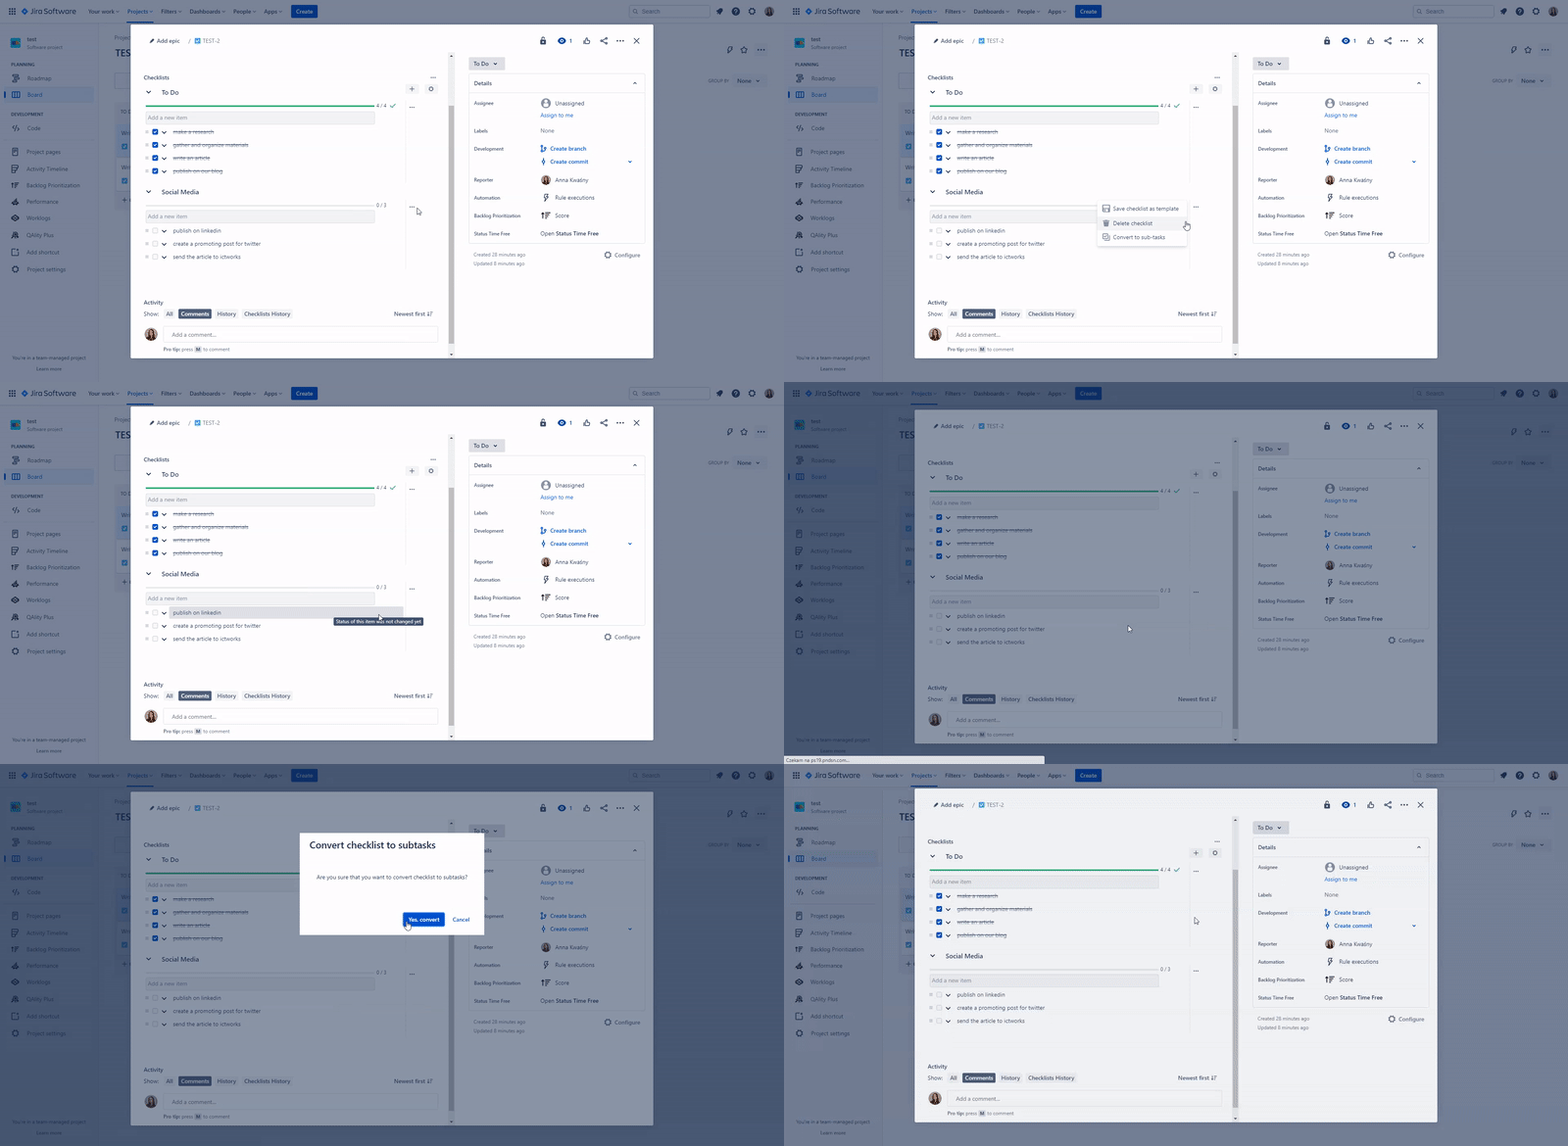
If you find out that particular tasks in the checklist are big enough for a separate task, from the checklist-view you can change it to sub-tasks:

Your sub-tasks will then appear in the task overview as child issues that are connected to the main task, but can be tracked separately:

At every moment, you can access the checklist history:

Why should you use Multiple Checklists?
Using checklists in Jira gives you some key advantages:
- Better organization of work. Following a checklist makes it easier to remember about all of the important aspects of a certain task, and allows more detailed descriptions.
- Helpful during refinement. If you are working in Scrum or Agile methodology, you know how important refinement is in every team. Checklist can help organize work within a task into smaller portions and track the progress of each point.
- Clear Definition of Done. Definition of Done is a list of requirements that need to be met to close the task, in other words, to recognize it as finished. Checklist makes it clear what needs to be done, what was already done, and how much work the issue needs. Clear requirements are an important part of transparency, one of the artifacts in Agile methodology.
- Creating checklist templates accelerates the process. You don’t have to write everything down every single time.
- Track checklist progress on Agile board. You don’t have to check every task to analyze the progress and needed amount of time.

More tutorials
How To Create A New Project In Jira?
How To Write Tasks In Jira?
How To Create A Digital Workplace In Confluence?
Most Helpful Atlassian Tools For Non-Profit Organizations
Holding Up The Sky: A Beginner’s Guide To Atlassian


